That sinking feeling when you spot a puddle on your kitchen floor is all too familiar. When the water is seeping out from under your dishwasher, your mind immediately jumps to expensive repairs and water damage. But before you panic, a methodical approach can help you understand exactly what you’re dealing with.
A leaking dishwasher is one of the most common appliance issues we see in San Diego homes. Often, the cause is surprisingly simple. This guide will walk you through the same diagnostic steps our technicians use to find the source of the leak, from the easiest checks to the more serious problems.
First, find the source: how to do a paper towel test
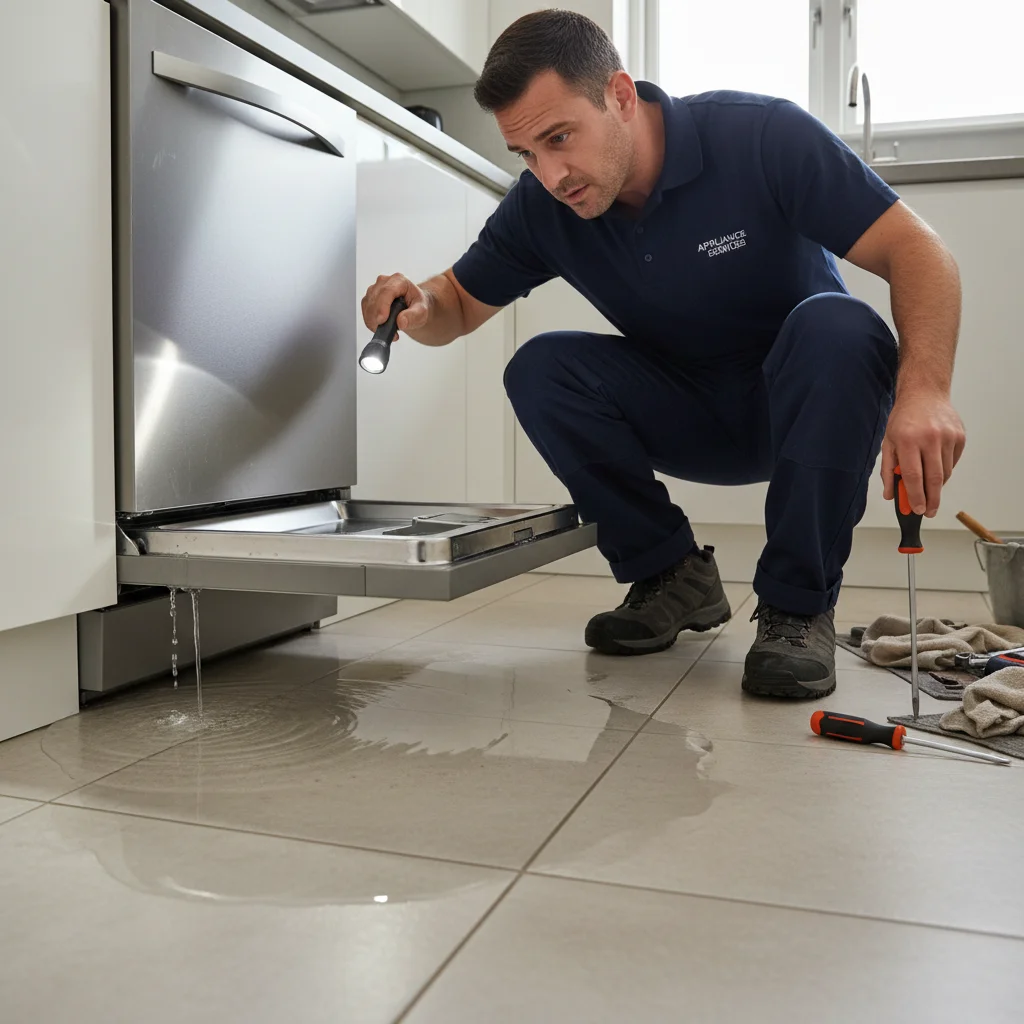
Water is sneaky. It can travel along the floor or the frame of the dishwasher, meaning the puddle you see might not be directly under the source of the leak. The first step is to pinpoint the general area where the water is escaping. This simple test helps you narrow down the possibilities significantly.
Safety First: Before you do anything else, go to your home’s circuit breaker and turn off the power to your dishwasher. You’re dealing with water and electricity, so safety is the top priority.
Here’s how to perform the paper towel test:
- Clean Up: Thoroughly dry the floor around and under the dishwasher. Mop up the existing puddle completely.
- Lay the Trap: Place a layer of dry paper towels on the floor under the entire front edge and as far back on the sides as you can reach. You want to cover the perimeter.
- Run a Cycle: Turn the power back on and start a short wash cycle. You don’t need to run the whole thing. Just let it run long enough to fill with water and start washing, which is usually within the first 10-15 minutes.
- Observe: Get a flashlight and watch the paper towels closely. Where do they get wet first?
- Front and center? This might suggest a door gasket issue.
- One of the front corners? This could point to the water inlet valve or hose connections.
- Further back? This might indicate a problem with the drain hose or even the tub itself.
This test doesn’t give you the final answer, but it gives you a crucial clue. Knowing where to focus your attention saves time and helps you accurately describe the problem when you call for professional help.
Checking the easy stuff: door gasket and filter
Once you have a general idea of where the leak is, start with the most common and easiest-to-fix culprits. In many cases, a dishwasher leaking from the bottom is actually leaking from the front, and the problem is related to simple maintenance. Two components are responsible for the majority of these “easy” leaks: the door gasket and the main filter.
The Door Gasket
The rubber or vinyl seal running along the edge of the dishwasher door and tub is called the gasket. Its only job is to create a watertight seal when the door is latched shut. Over time, it can get dirty, brittle, or damaged.
- How to Inspect: Open the dishwasher door and carefully run your fingers along the entire length of the gasket. Feel for any sections that are cracked, torn, or flattened. Look for built-up food debris or mineral deposits, which can prevent a proper seal.
- How to Clean: Often, a simple cleaning is all that’s needed. Use a soft cloth with a mixture of warm water and a little white vinegar to wipe down the entire gasket. Pay special attention to the bottom edge, where gunk tends to collect.
- When to Replace: If the gasket is visibly damaged (torn, warped, or hardened) it can’t create a good seal and needs to be replaced.
The Main Filter
At the bottom of your dishwasher’s interior is a filter designed to catch food particles and prevent them from clogging the drain pump. If this filter becomes completely clogged, water can’t drain properly. During a cycle, this can cause water to back up and seep out from under the door.
- How to Inspect: The filter is usually a cylindrical component that you can remove by twisting it counter-clockwise. Check your owner’s manual if you’re unsure. Pull it out and see what you find.
- How to Clean: If it’s full of debris, take it to the sink and rinse it under hot water. Use a soft brush (an old toothbrush works well) to gently scrub away any stubborn grime. Do not use a wire brush, as this can damage the filter mesh.
A dirty filter is a very common cause of performance issues. In fact, a clogged filter is often the reason a dishwasher isn’t cleaning your dishes properly. Cleaning it every month or so is great preventative maintenance.
Is it the drain hose? Common connection point leaks
If the door gasket and filter look good, it’s time to investigate the plumbing. The drain hose is a flexible, often corrugated tube that carries dirty water from your dishwasher to your sink’s drain or garbage disposal. Leaks can develop in the hose itself or at its connection points. The paper towel test might have pointed you toward the back of the unit, which is a strong indicator of a hose issue.
To check the drain hose, you’ll likely need to carefully pull the dishwasher out from under the counter a few inches. Remember to shut off the power at the breaker first.
Here are the three main places to look for a leak:
- Connection to the Dishwasher: At the back or bottom of the dishwasher, the drain hose connects to the drain pump. This connection is secured with a spring or screw clamp. Check this area for drips, white or green mineral buildup, or signs of rust on the clamp. The clamp may have loosened over time, or the hose end may have become brittle and cracked.
- Connection to the Sink Drain/Disposal: Follow the hose to where it connects under your sink. It will either attach to a dedicated nipple on your garbage disposal or to the sink’s P-trap. Again, inspect the clamp and the end of the hose for any signs of leaking. This is a very common failure point.
- The Hose Itself: Run your hand and a flashlight along the entire length of the drain hose. Over years of vibration, the corrugated ridges can rub against the cabinet or the floor, eventually wearing a pinhole-sized leak. These are hard to spot when the machine is off but will often produce a fine spray of water during the drain cycle.
If you find a loose clamp, tightening it might solve the problem. If the hose itself is cracked or damaged, it will need to be replaced.
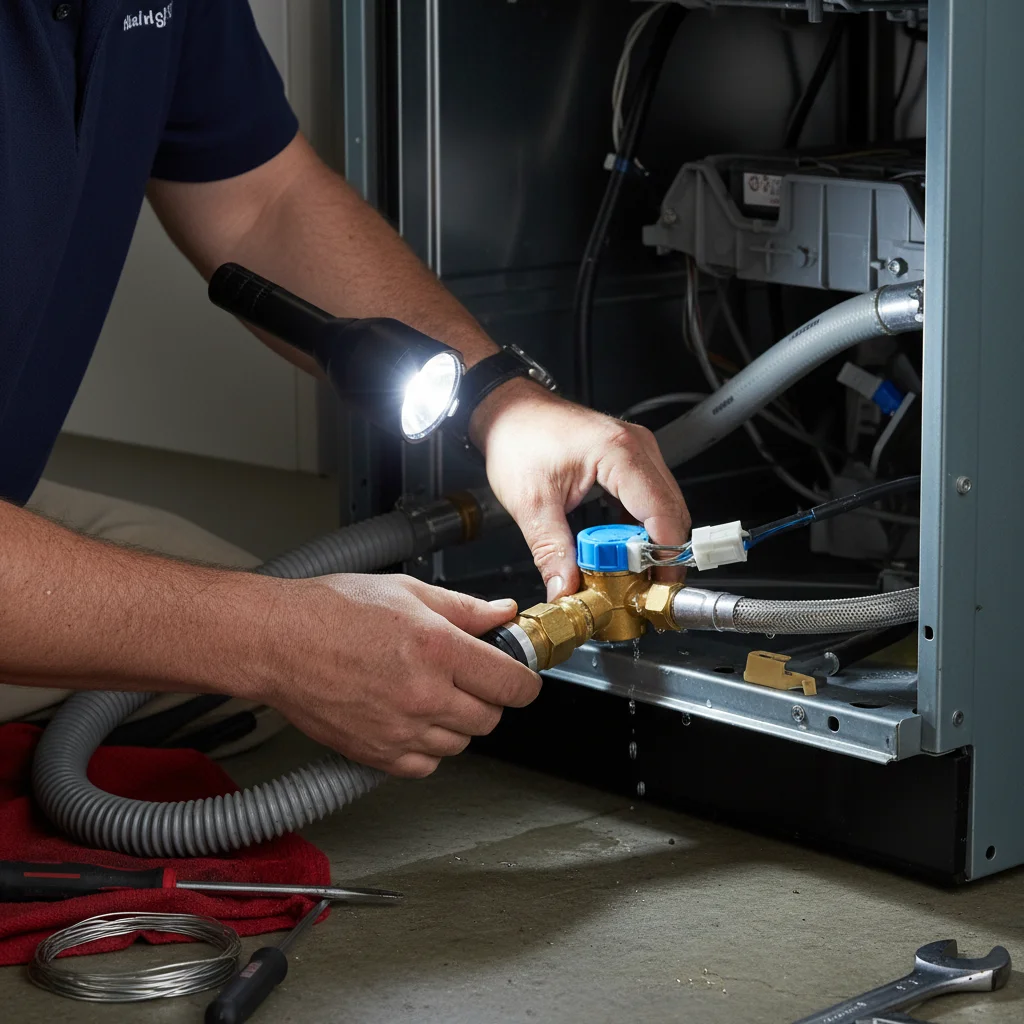
When it’s the water inlet valve (and what that looks like)
The water inlet valve is a small, essential part that controls the flow of fresh water into your dishwasher. It’s an electronically controlled valve connected to your home’s hot water supply line. When this valve fails, it can cause a persistent, slow drip that eventually forms a puddle.
The valve is almost always located at the front-bottom of the dishwasher, typically on the left side, behind the lower access panel (or kick plate).
- How to Inspect: After turning off the power, remove the one or two screws holding the kick plate in place. With a good flashlight, look for the brass fitting where your home’s water line (often a braided steel hose) connects to the plastic valve body.
- What to Look For: You’re looking for two things. First, check the connection point itself. Is there a drip coming from the nut that secures the water line? This might just need tightening. Second, inspect the plastic body of the valve. These can develop hairline cracks from age and water pressure, causing a very slow seep. You’ll often see tell-tale signs like white, chalky mineral deposits or even a bit of green corrosion on or below the valve.
A failing inlet valve can also malfunction internally, failing to close properly and causing the dishwasher to overfill. If water is pouring out of the door vent or from under the door during the fill cycle, a faulty inlet valve is a likely suspect. Replacing an inlet valve involves shutting off the water supply and working in a tight space, which is often a job best left to a professional.
The worst-case scenario: a cracked tub or pump assembly
While most leaks are caused by the components we’ve already covered, there are a couple of more serious possibilities. These are less common, but they typically result in a more significant leak and require a professional repair.
A Cracked Tub
The tub is the main body of your dishwasher, the plastic or stainless steel basin that holds the water. While durable, tubs can crack due to a manufacturing defect, age, or an impact from a heavy dropped item. A crack in the tub will almost always cause a leak directly below the damaged area.
- How to Spot It: To check for this, you’ll need to remove the bottom rack and get a flashlight. Carefully inspect the entire bottom surface of the tub, especially around the heating element and the filter housing. A crack might look like a thin, dark line.
- Repair Outlook: Unfortunately, a cracked tub is often a fatal diagnosis for a dishwasher. The part itself is expensive, and the labor required to replace it is extensive. In most cases, the cost of the repair approaches or exceeds the cost of a new, comparable machine.
The Main Pump and Motor Assembly
This is the heart of your dishwasher, located in the center underneath the tub. It’s a complex assembly that houses the main motor for circulating water through the spray arms and the pump for draining used water. This assembly has several seals and gaskets that can fail over time.
- How to Spot It: A leak from the pump or motor assembly will typically appear as a drip coming from the very center of the dishwasher’s underside. It’s often most active during the wash and drain portions of the cycle.
- Repair Outlook: This is a major repair that requires completely uninstalling the dishwasher, flipping it over, and performing significant disassembly. While it’s certainly fixable, it’s not a DIY job. A professional technician can determine if replacing the pump seal or the entire assembly is the most cost-effective solution. This type of fix is a standard part of our dishwasher repair service in San Diego.
Frequently asked questions
What causes a dishwasher to leak from the bottom?
The most common sources are a dirty or damaged door gasket, a clogged main filter causing water to back up, a loose drain hose clamp, and a failing water inlet valve. A cracked tub or failed pump seal are less common but cause larger, harder-to-trace puddles. The paper towel test, laying dry towels under the unit and running a short cycle, helps identify which area is leaking first.
How do I check if the door gasket is causing the leak?
Run your fingers along the entire rubber seal around the door opening, feeling for cracks, tears, flattened sections, or built-up food debris. A simple wipe-down with warm water and white vinegar often restores the seal if it’s just dirty. If the gasket is visibly damaged or hardened, it needs to be replaced.
What does the water inlet valve have to do with a dishwasher leak?
The water inlet valve controls fresh water flowing into the machine from your home’s supply line. It sits at the front-bottom behind the kick plate and can develop hairline cracks or a faulty seal over time. Signs of a bad valve include mineral deposits or green corrosion on or below the valve body, and a slow drip that forms a puddle even when the dishwasher isn’t running.
When is a leaking dishwasher not worth repairing?
A cracked tub is often the point where repair cost approaches the price of a new machine. The tub is expensive to source and labor-intensive to replace. A failed pump and motor assembly is also a major repair, but a technician can confirm whether replacing just the pump seal is enough, which is far cheaper than a full assembly swap.
When to call us
You’ve done your due diligence. You’ve checked the gasket, cleaned the filter, inspected the hoses, and peeked at the inlet valve. If you’ve found the source and it’s a simple fix like tightening a clamp, great. But if the leak is coming from the motor, the tub is cracked, or you simply can’t find the source, it’s time to call in a professional.
Continuing to troubleshoot complex components without the right tools and experience can lead to bigger leaks, significant water damage to your kitchen floors and cabinets, or even electrical hazards. Our technicians at Repair Pro San Diego have the diagnostic equipment and parts on hand to find the problem quickly and fix it safely. We handle leaking dishwashers every day across San Diego County and can give you a clear, honest assessment of the repair.
Call us at (858) 988-7787 for a same-day estimate.